Setting up the Swing Catalyst Lynx GigE camera(s)
How to set up the Swing Catalyst Lynx camera
This article covers basic camera information as well as how to setup and configure the Lynx GigE camera from Swing Catalyst.
For a brief step by step guide please see : https://swingcatalyst.com/camera-guide
This article is split into different sections
Getting started: Hardware setup
Installing the dual port network card
Driver installation and enabling the camera(s)
Troubleshooting tips
Camera information:
Both the “Lynx” and “Fox” cameras are only supported in Swing Catalyst 9.8.2 or higher.
Which version of the software am I running?
This is a GigE based camera that is capable of Power over Ethernet (PoE). Please make sure you’re using the recommended PoE network card or have a auxiliary power supply (Available from our web-shop or by contacting your Swing Catalyst sales agent)
The maximum frame rate for this camera is 320 FPS.
This camera has a resolution of 720x540
Getting started: Camera Assembly
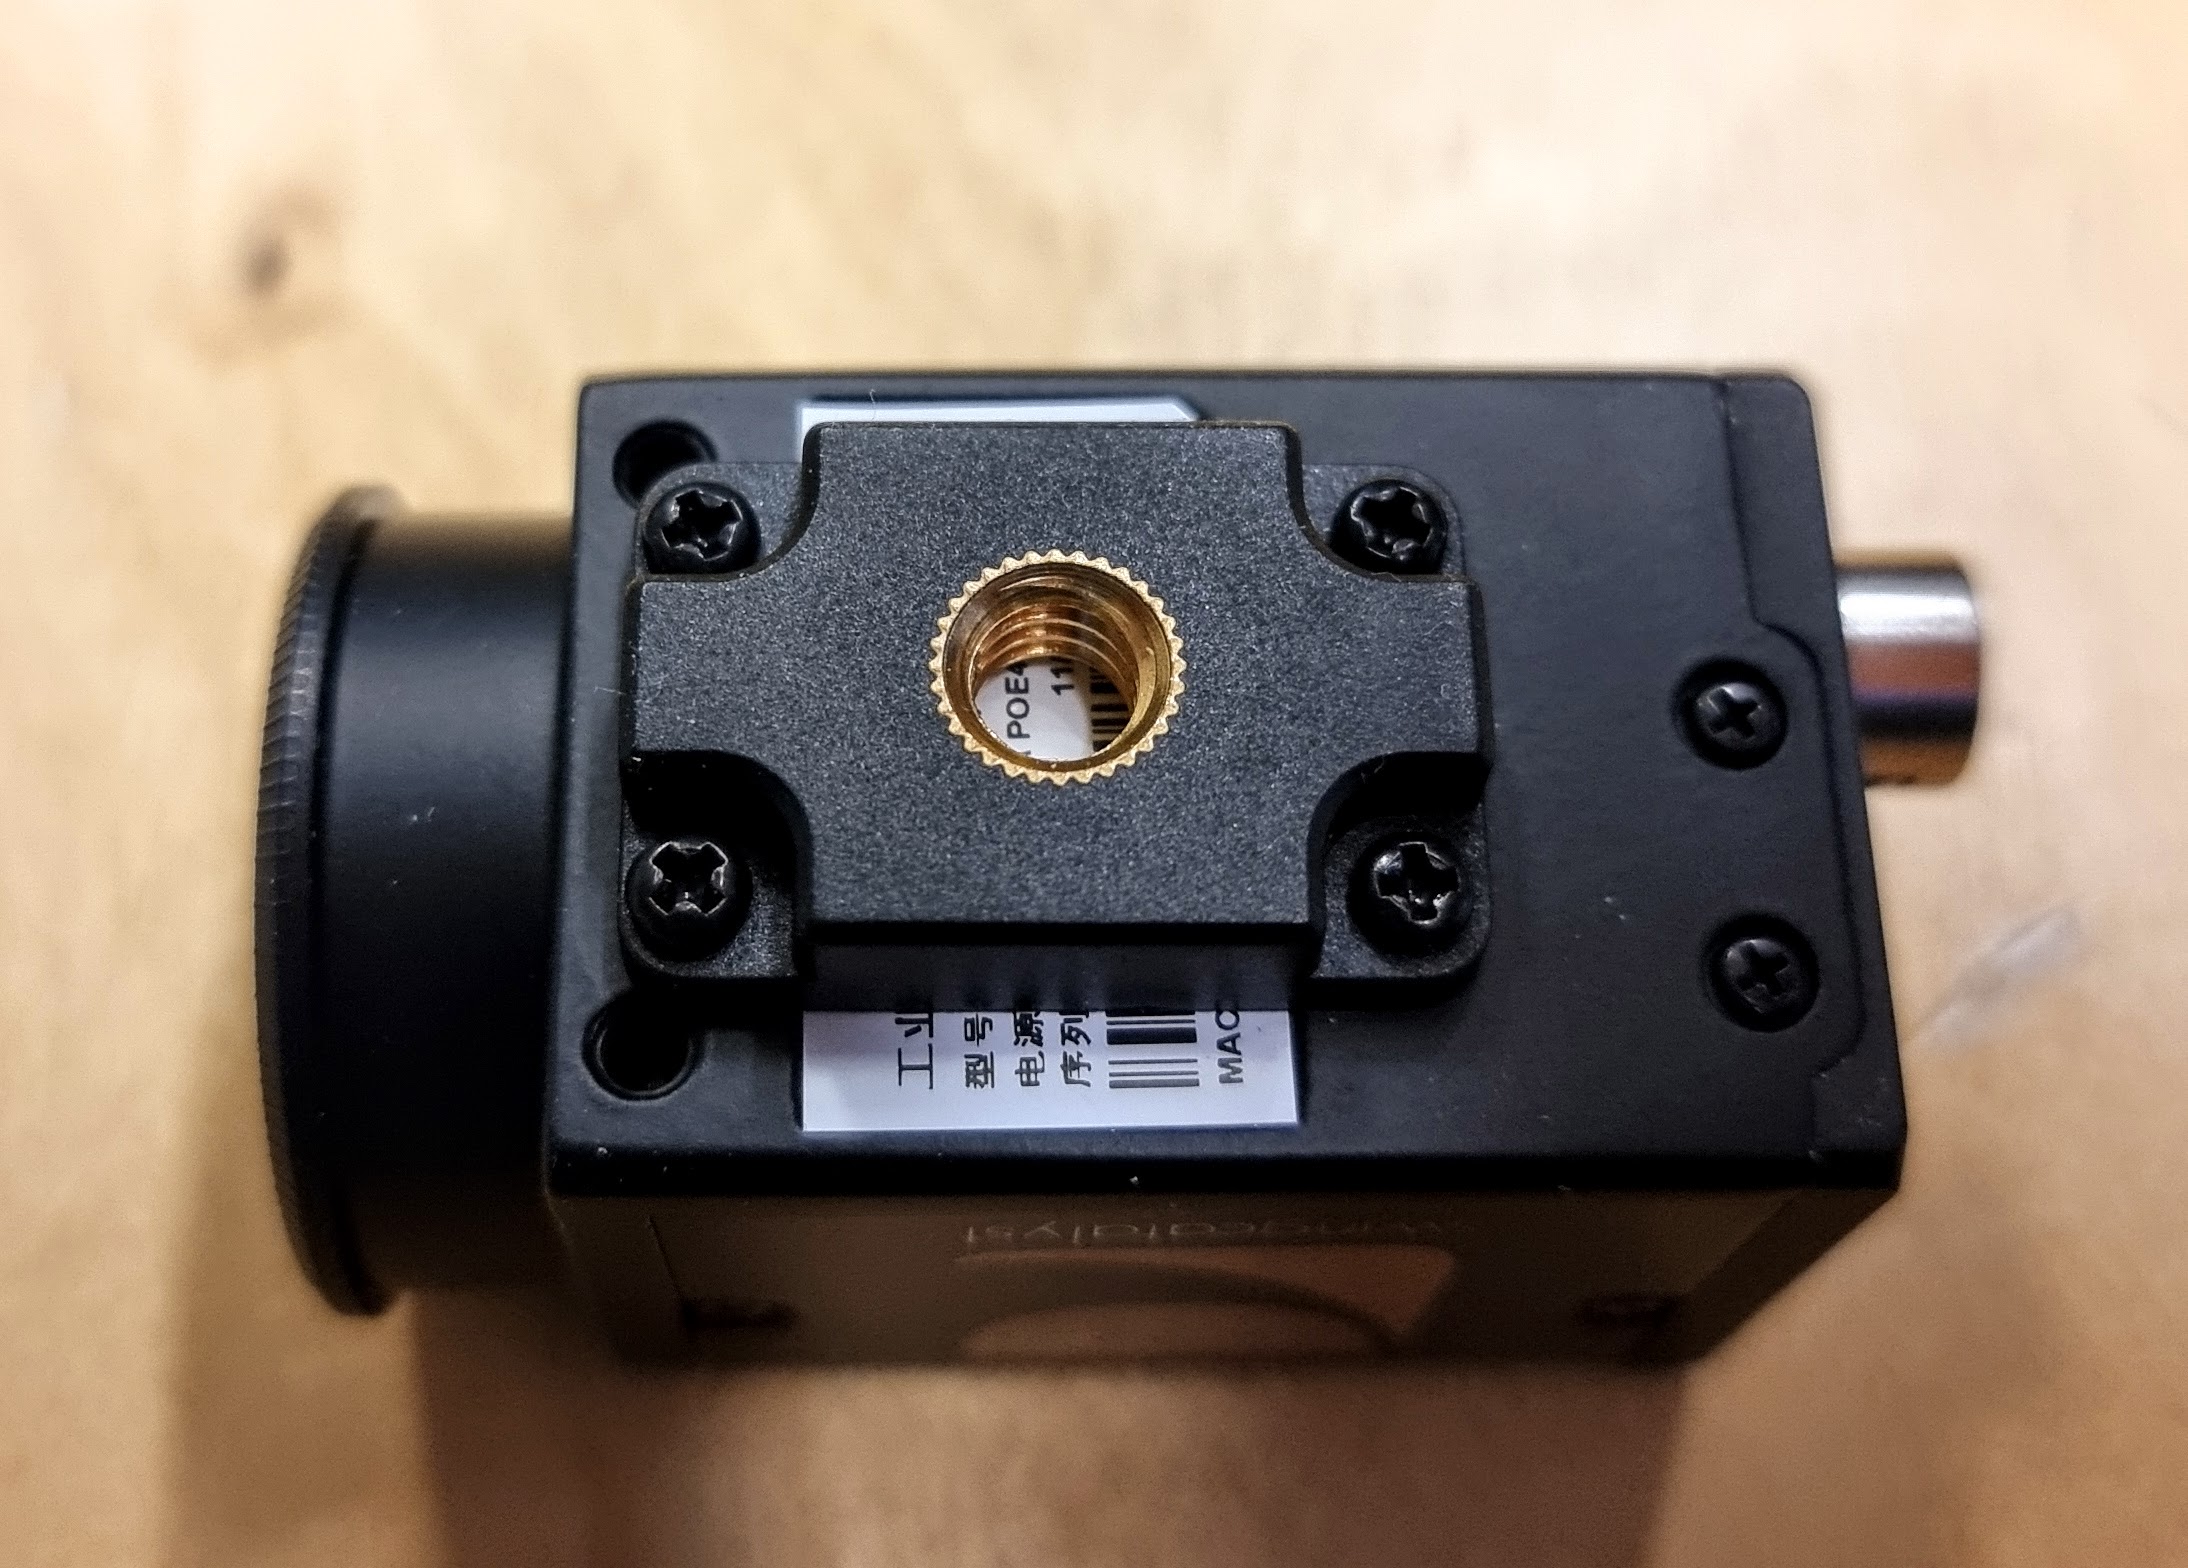
Attach the tripod adapter to the camera body using the 4 black Phillips head screws included with the camera.
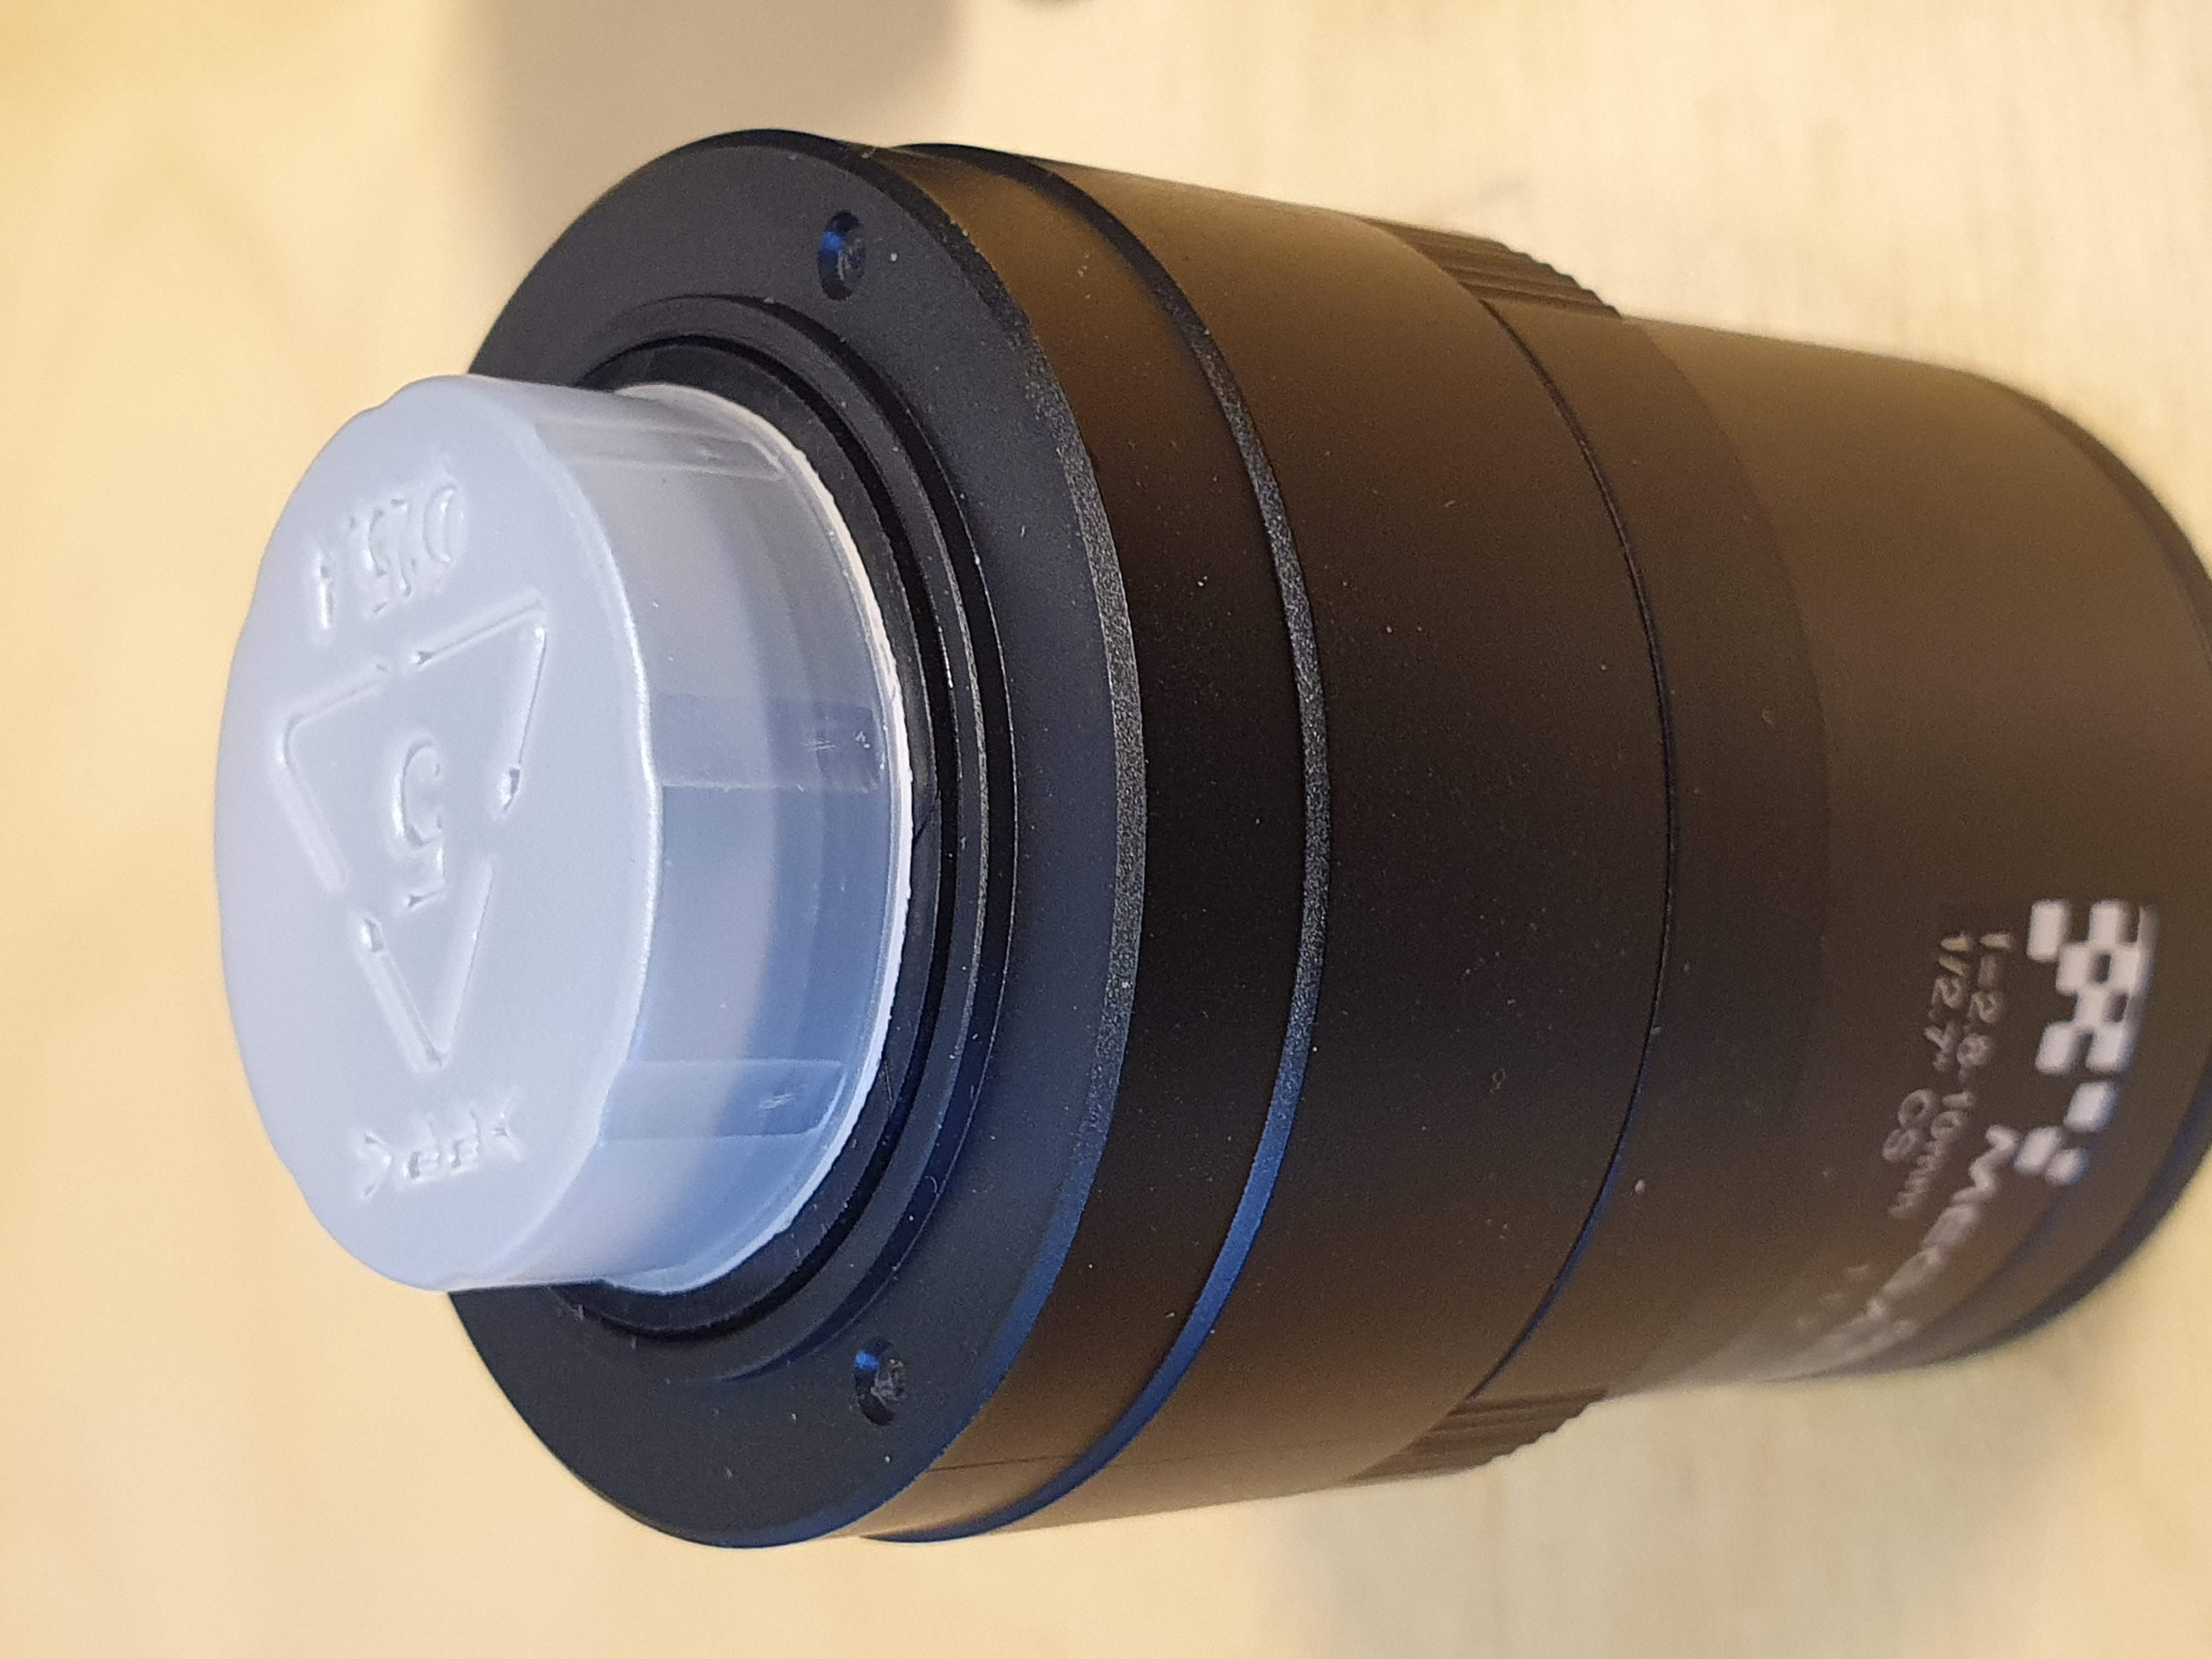
Unpack the lens and make sure to remove the plastic lens covers
Remove the sensor cover from the camera

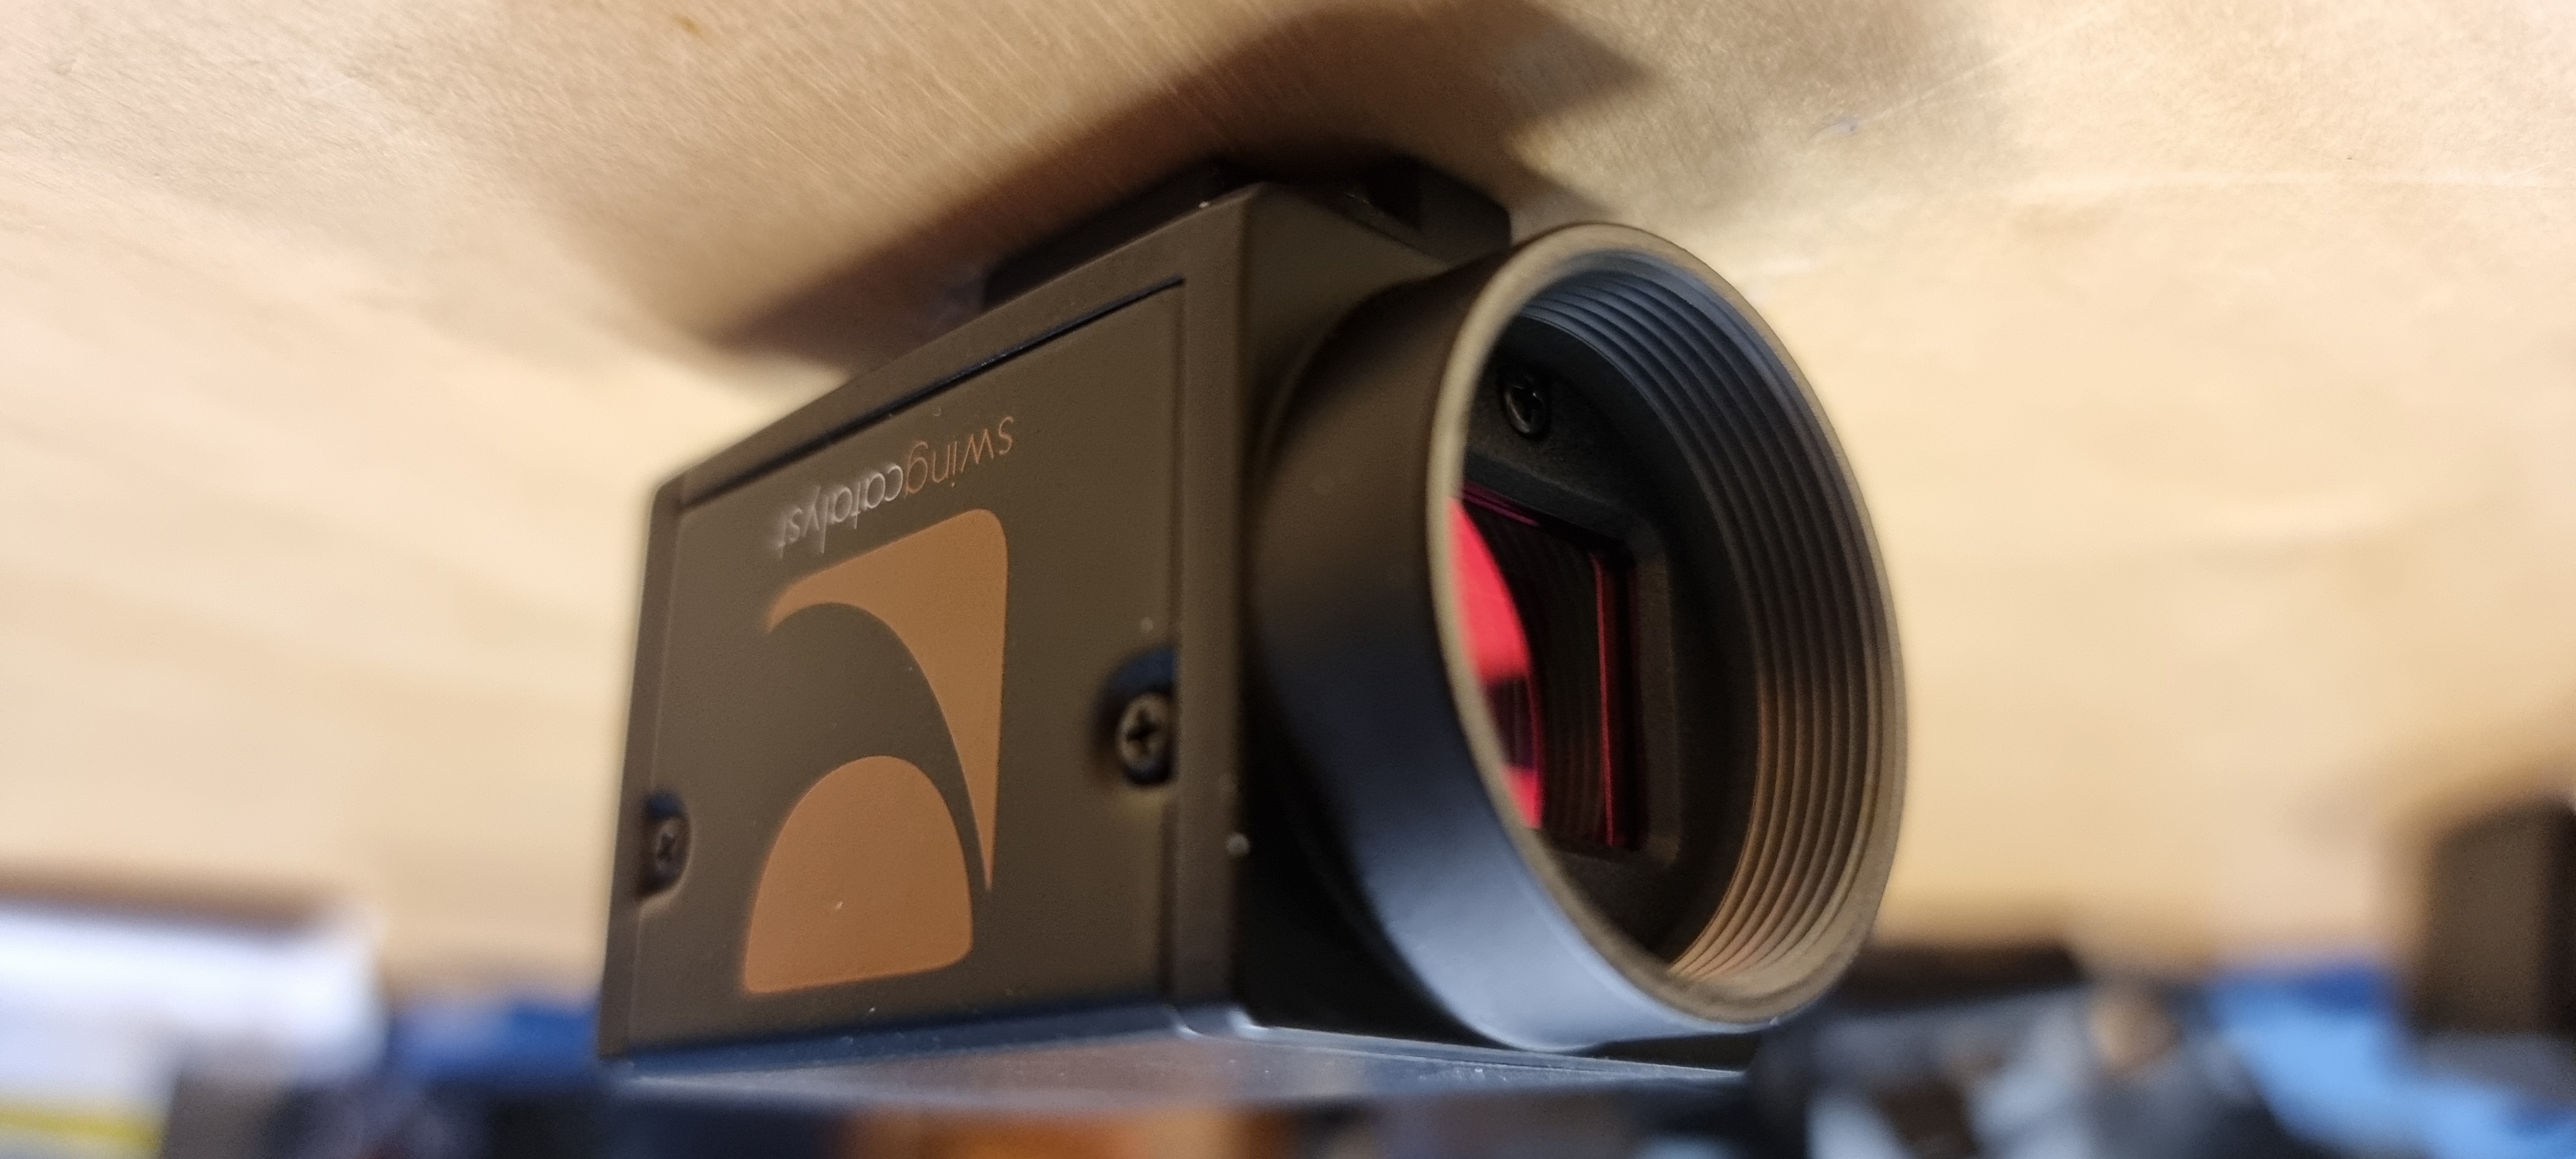
Attaching the lens to the camera
Adjusting the camera lens
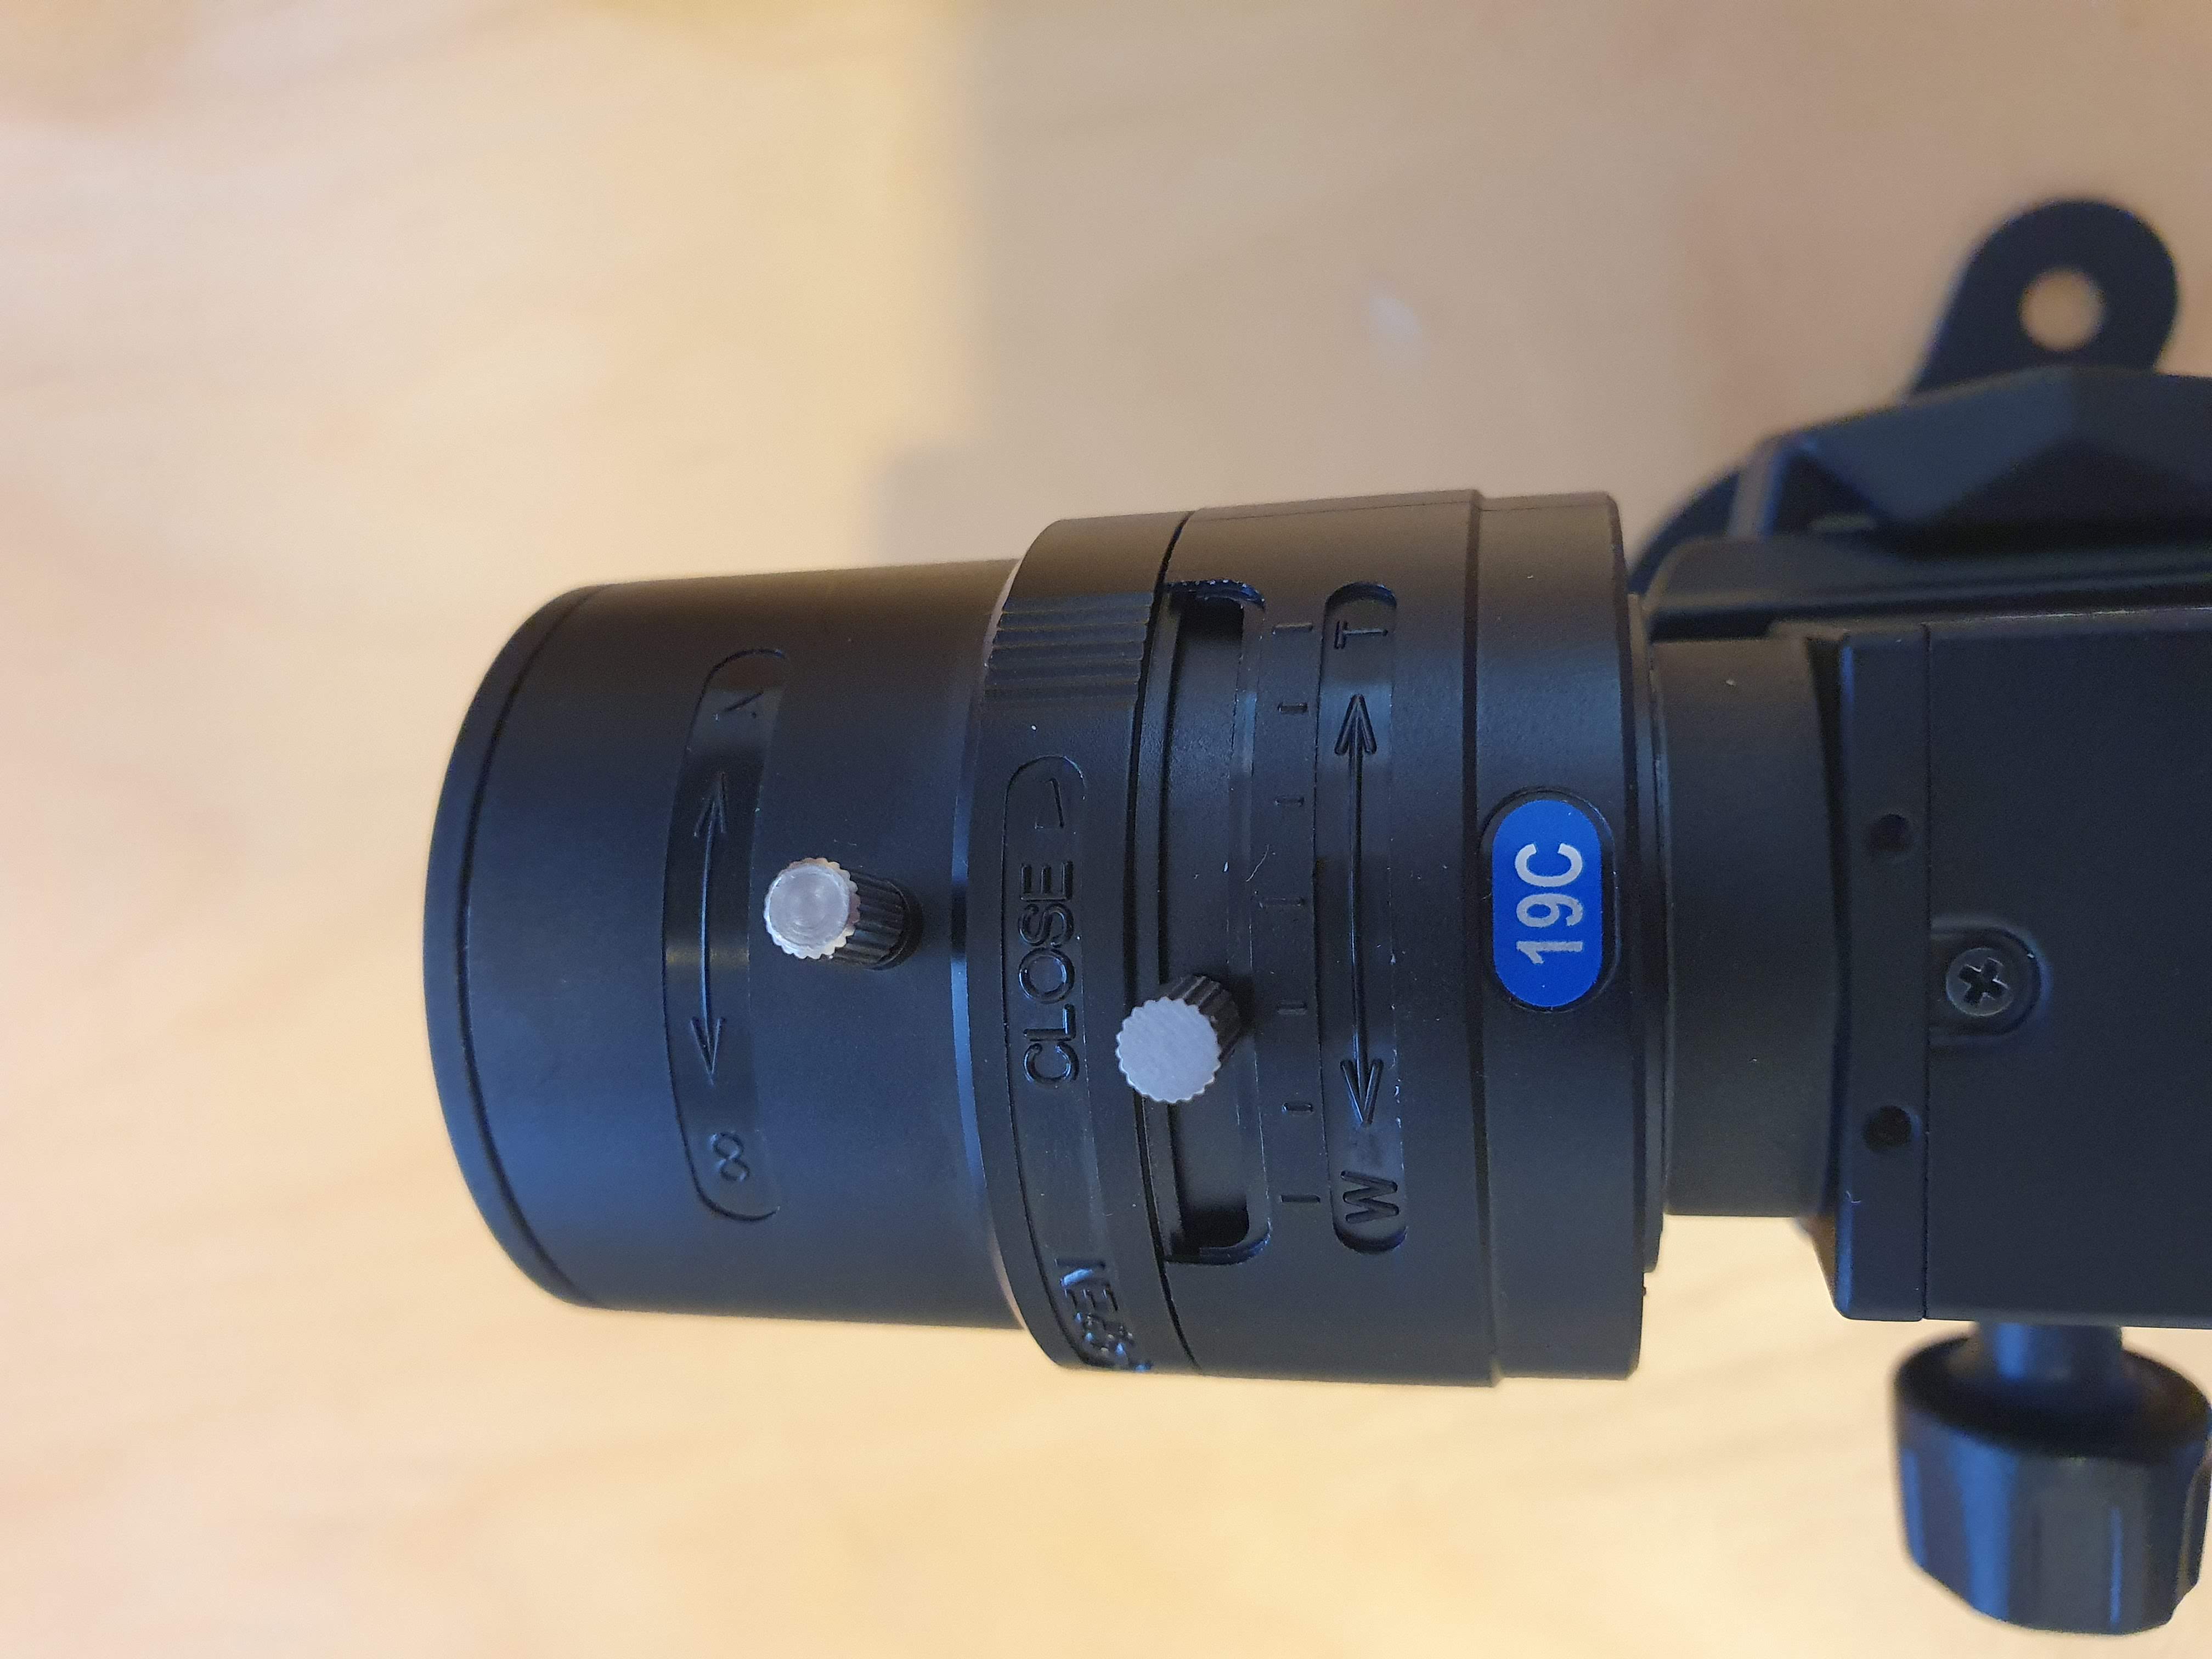
This lens has three adjustments, from top to bottom:
Focus (adjusting towards the ∞ symbol will make objects further away in the background in focus)
Aperture (iris adjustment, will adjust how much light is able to pass through the lens, a more closed aperture will result in a sharper image).
Zoom (adjusts the zoom of the lens wide or telephoto).
Installing the dual port network card:
Required Configuration
The network card must be configured per recommendations. See GigE Network Setup .
Please see this video if you have the 4-port variant:
How to configure your network card
Please note that you have to repeat these steps for any network adapter that you intend to use with a camera.
Enabling Jumbo Frames
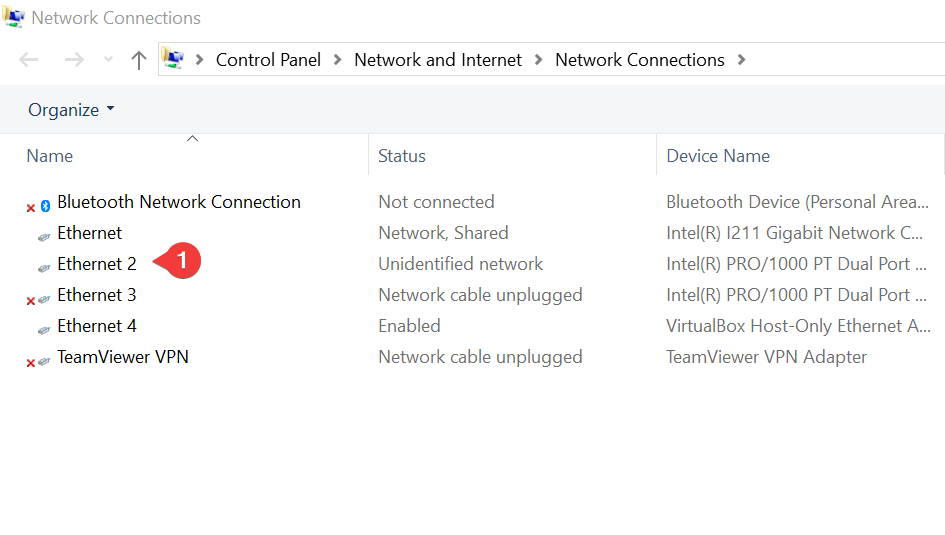
Click your start button and type in “Network Connections”
Right click the Ethernet ports your cameras are connected to and go to “Properties”.
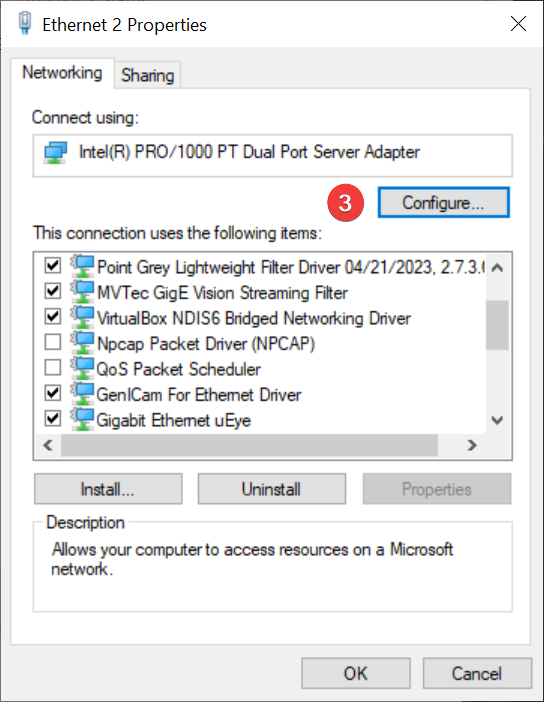
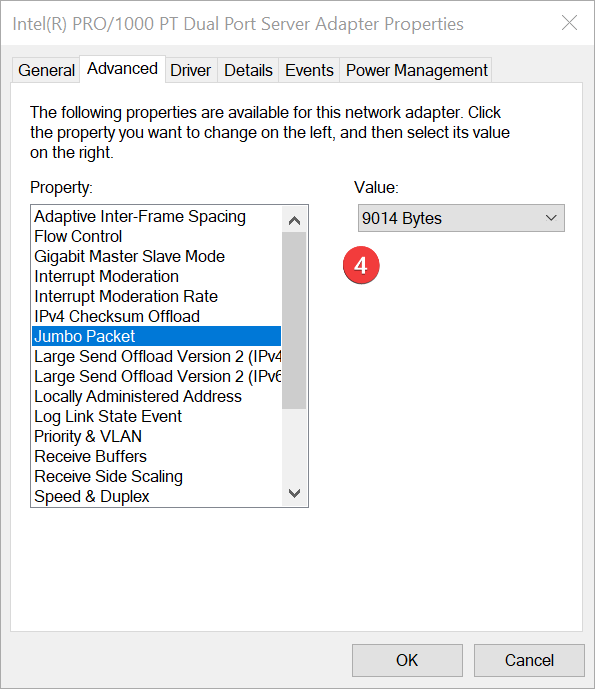
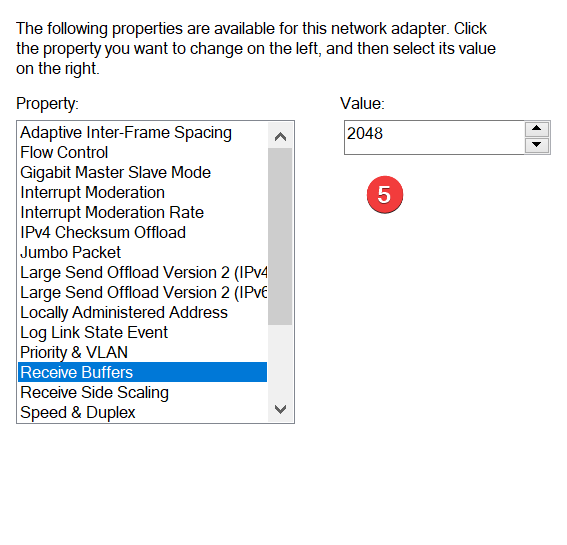
Click the “Configure” button and go to “Advanced”.
Set “Jumbo Packet” value to 9014.
Set “Receive Buffers” to 2048.
Driver installation and enabling the camera(s):
Step 1: Connect your camera(s) to the PoE network ports on your PC using a Cat5 or Cat6 Ethernet cable and make sure you have a solid blue light on the back of your camera.
Step 2: Click to Download and install the drivers for your camera(s)
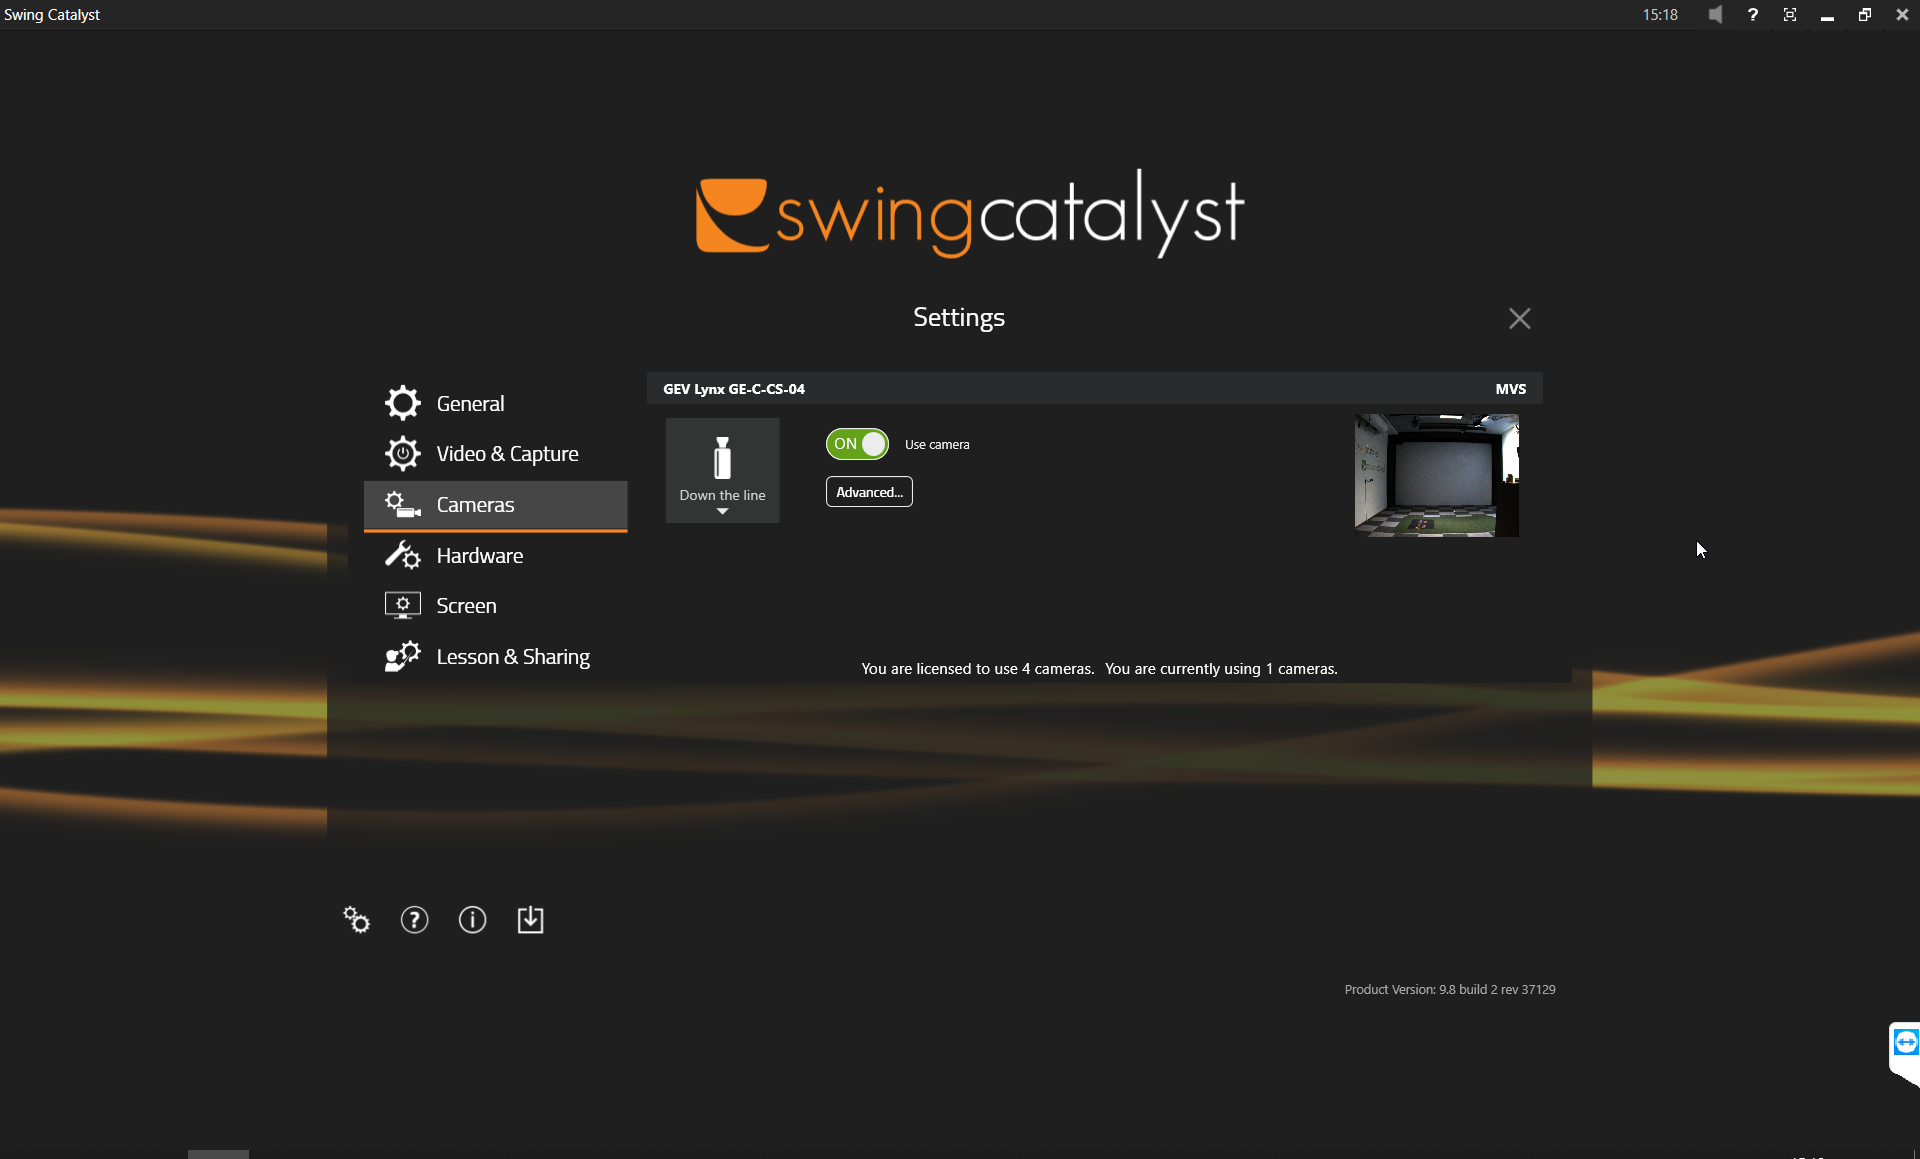
Step 3: Open Swing Catalyst and click on the gear icon in the bottom left corner of the main menu and go to your Cameras settings.
Step 4: Click the Play button to get a preview. Then click “Disabled” and assign the appropriate angle to each camera. Lastly switch the camera from “Off” to “On”.
Configuring the camera settings:
Camera Exposure Settings
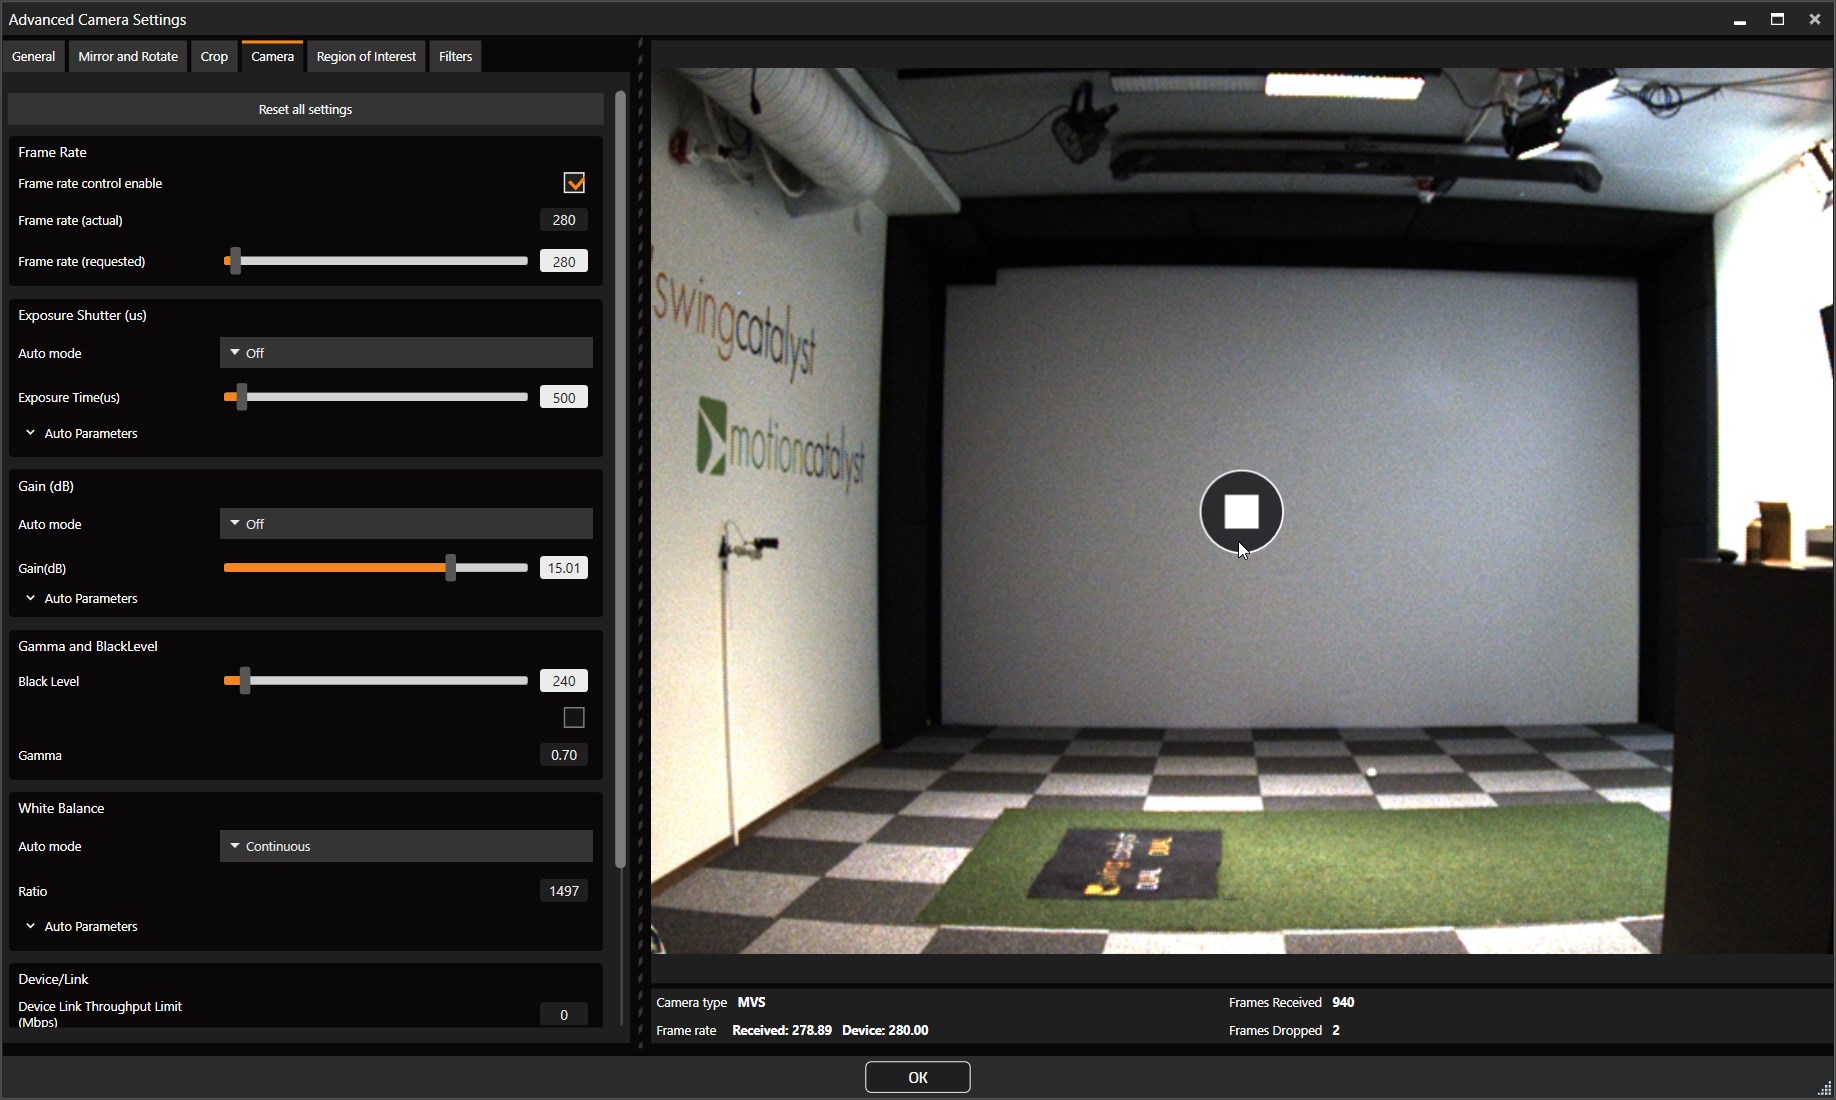
For clear club and shaft views, keep exposure below 600. Boost the image brightness by adjusting the gain. Optimal lighting: install three Thomann 100w lights — one each down the line, right, and left — mounted at least 1.5 meters from the ball, either on ceiling or wall.
Click the “Advanced” button and go to the “Camera” tab.
Assign the same values as the pictures below.
Set all values that show “continuous” to “off”.
Repeat this for any other Lynx cameras you have connected.
Info
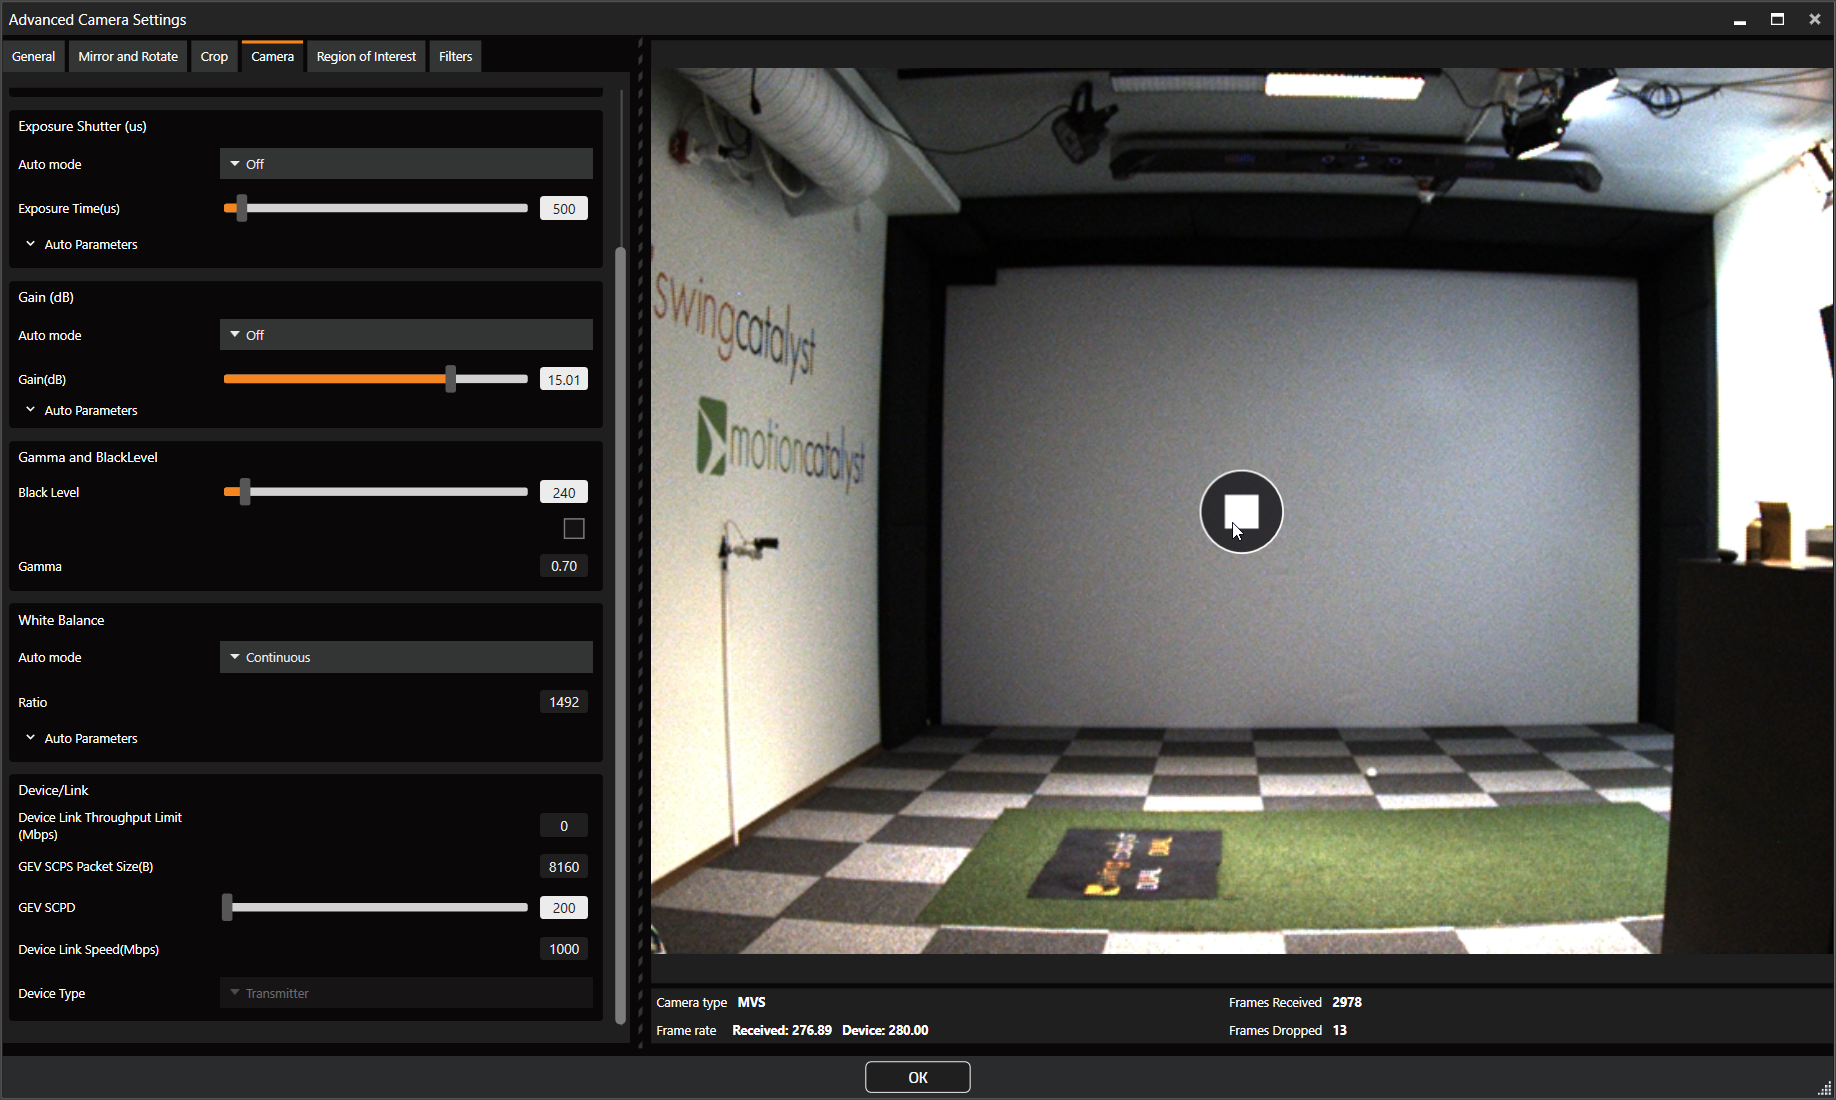
If you have 3 or 4 cameras we recommend setting GEV SCPD to 150.
You should now be able to close the settings and go into capture mode to start recording.
Cameras are not showing up in Swing Catalyst settings:
Ensure you have the latest MVS/Runtime installed (4.6.1)
Dropped frames:
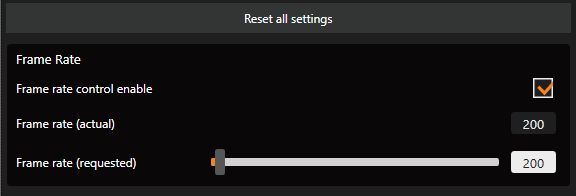
Reducing the frame rate on each camera may help avoid or reduce dropped frames.
Do you have one of the recommended network cards? If not it may be the network card itself that is causing problems. Please contact our sales team to ensure you have the proper network equipment.
Improper network card configuration. Check that 9kB jumbo frames is enabled on each network adapter. See our support article on recommended configuration
Set GEV SCPD to 150 if using more than 2 cameras (see the camera settings under the Device / Link section).
Confirm that the link speed is 1000 Mbps not 100 Mbps (see “Device Link Speed” under the Device / Link section in camera settings).
Link speed is 100 Mbps:
If the link speed is 100Mbps instead of 1000Mbps the cable you’re using may be bad or damaged, or the network adapter might not support Gigabit speeds. Try replacing the cable.
Try to reset camera the camera settings to defaults, check link speed again under the “Device/ Link” section in camera settings.
Check the status of the network adapter from the Windows Control Panel
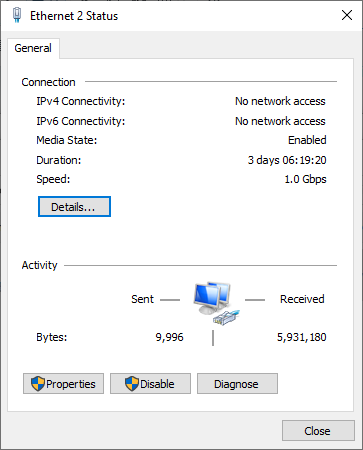
Note: Speed should be 1.0 Gbps (1000Mbps), not 100Mbps.
Reducing dropped frames additionally by using Region Of Interest (ROI):
Using a region of interest (or area of interest) will reduce the overall image size and boost the FPS, but also it can help lower the bandwidth usage which in turns could reduce dropped frames (see above on how to utilize ROI).
Connectivity problems (camera disconnects):
Inspect network cabling.
If using external power supplies to cameras, check power supply connection.
Camera doesn’t turn on / no power received:
- If using a PoE network card with more than 2 ports, verify that the network card has external power connected to it from the computer.
Other problems:
Depending on your hardware it might not be the best to have the sharpening and denoise filters on, turning these off will reduce some CPU & GPU usage. You can find the camera filters in the Advanced Camera Settings Filters tab. More info on filters here: improving-image-quality.md
How to set static IP
This article covers how to set a static IP address on the Lynx cameras and network cards respectively: How to set static IP on Lynx GigE cameras